Social Distance Detection System - Using Raspberry Pi and OpenCV AI Kit
Jan 14, 2021
Today we are going to build our own real-time Social Distancing Monitoring Alarm using a Raspberry Pi and the OpenCV AI kit with Depth Capability. This Raspberry Pi social distance camera will be able detect a people using either a MobileNet SSD or YOLOv3 tiny model at 30 FPS to sound an Alert, to politely remind people to maintain their social distance.
Step 1: What You Will Need
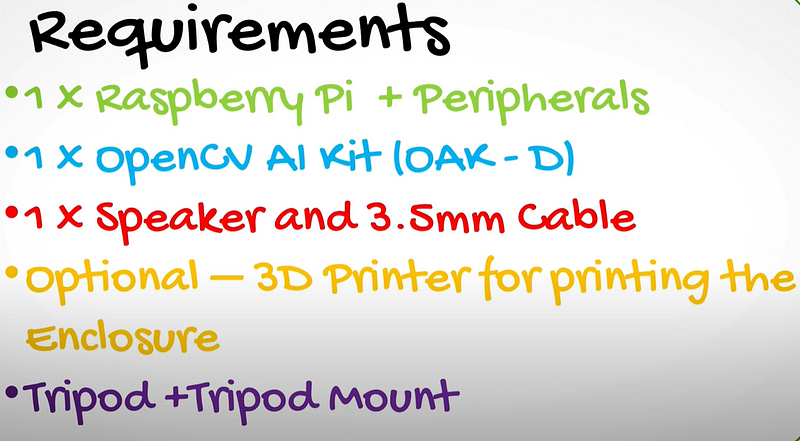
Our Requirements are:
- A Raspberry Pi with all the accessories
- The OpenCV AI Kit, I’m using the OAK D because of its depth capability
- You will need a speaker and 3.5mm aux cable to project the audio alerts
- What’s optional is a 3D printer for printing out the enclosure for the OAK-D which may be connected to tripod
Step 2: How It Works
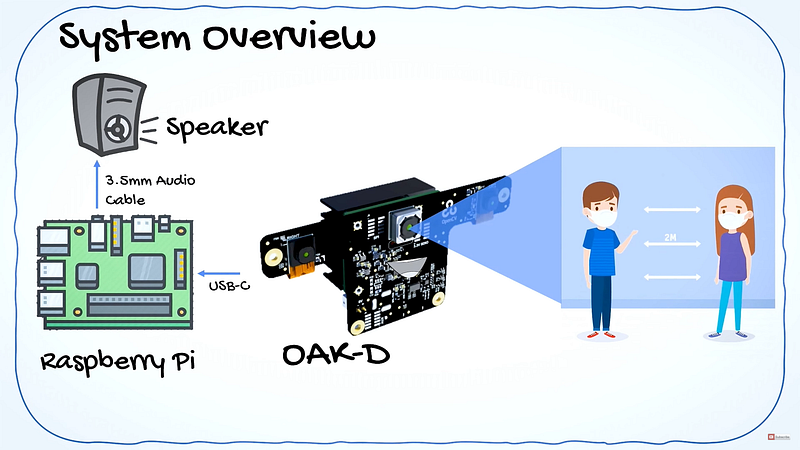
Assuming that two people are in close proximity. If they cross the acceptable social distance threshold our OAK-D AI camera will respond by sending the detected people to the Raspberry Pi, where our code resides.
The code will wait for the moment when the social distance threshold has been violated and immediately sound an alert to a loud speaker, either via the analog cable or HDMI to an external speaker.
You will have the ability to view the output over remote desktop or use flask to build a webserver from which to view the output.
Step 3: Schematic
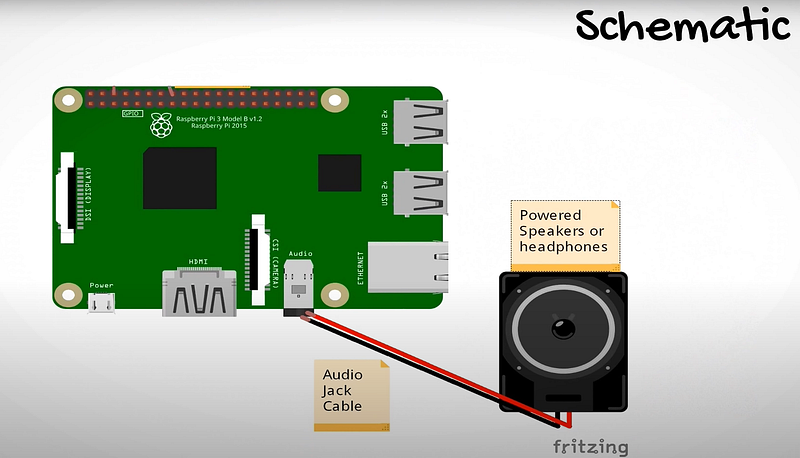
The Schematic are very simple, you just need to connect your portable speaker via a 3.5mm auxiliary cable to the Raspberry Pi.
Otherwise if you have a monitor with speakers you can just output the sound via HDMI.
Step 4: How the Code Works
So how this social distancing app works is that the camera captures the raw image at Stage 0.
Stage 1
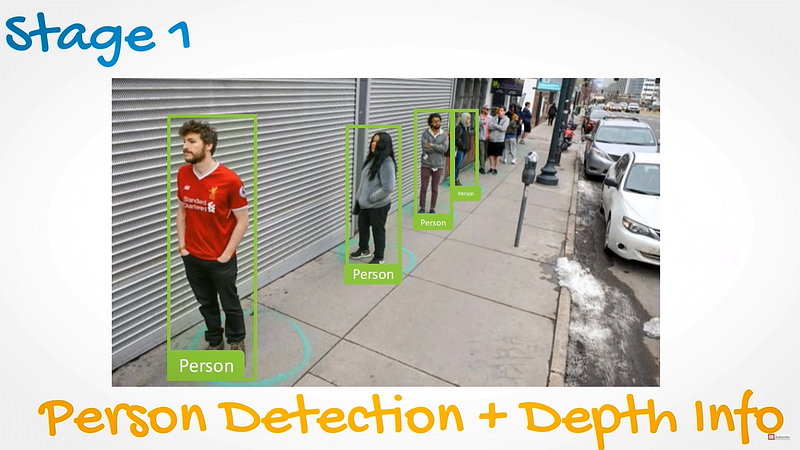
the image is parsed to detect people in the image. Upon detection the depth info is also added to the detection.
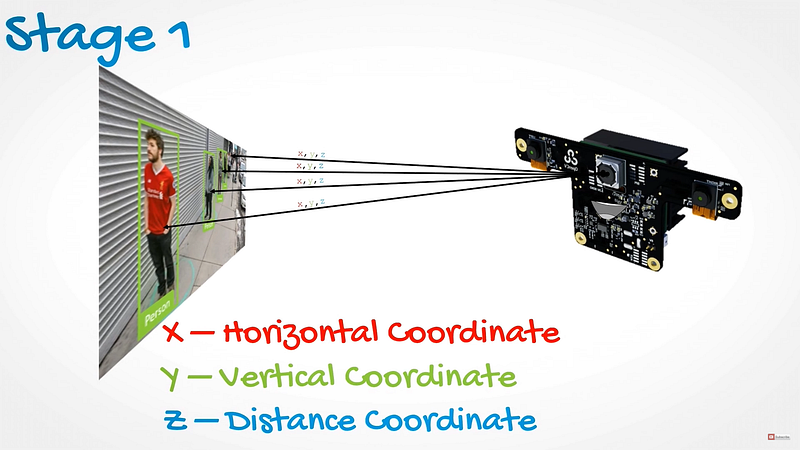
The DepthAI API provides the depth info in all 3 dimensions: X — the horizontal coordinate, Y — the vertical coordinate, Z — distance coordinate.
This allows us to create a 3D vector in space pointing from the front of the camera relative to the detected objects.
Stage 2
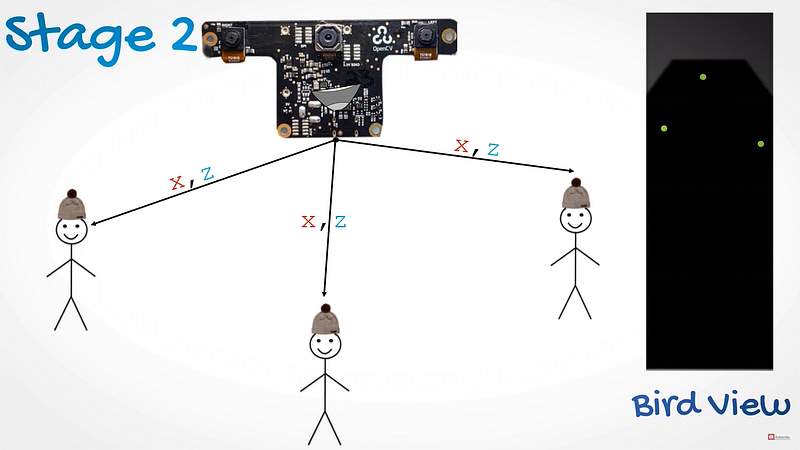
2-D Mapping — For explanation purposes, its easier to imagine the position of people in 2D space, taking only the X and Z coordinates into account.
We can map our space into a birds eye view or bird view for short, showing the position of the people in 2D space projection.
This perspective makes it possible to use simple 2D geometry for distance calculations and can be useful to understand how the camera is determining out position in space.
However in the app itself, the 3D distance is utilized as there is no downside to it, and it can provide more accurate results in the case of handing some edge cases.
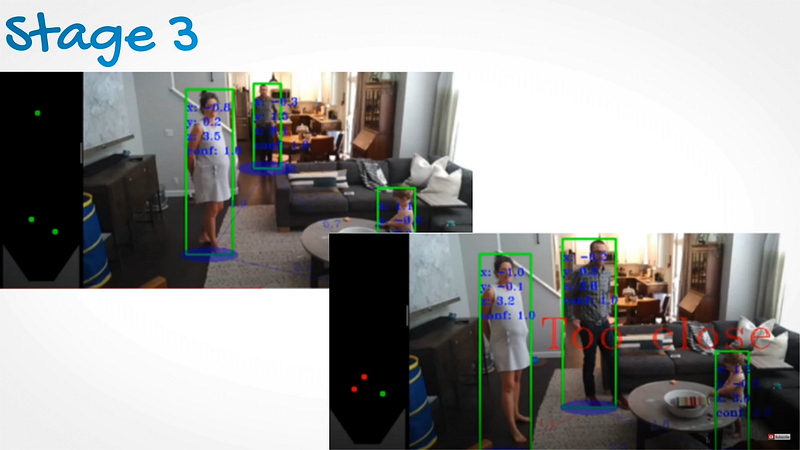
Stage 3
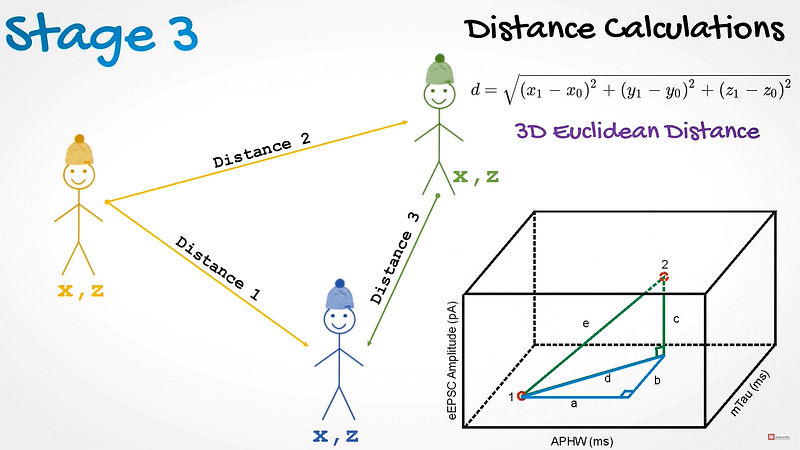
Knowing each persons position, we can now calculate the distances between them and check if they do not exceed the defined threshold.
Step 5: 3D Printing the OAK-D

You can download the CAD files from depthai-hardware/User-Contributed-Mechanical-Designs.md at master · luxonis/depthai-hardware (github.com)
When you download the files, there will be multiple STL files, which you can then we can send our files to the 3D printer to print separately.
We want to ensure that we are able to mount our OAK D on a stand or tripod. Now I have modified the one mounted part to be a go pro mount rather than a quarter inch mount, so you can decide how you would like to mount it. I shall attach a go-pro tripod mount and tripod that I will link in the description for you, if you require it.
And we slice it.
I found with the OAK-1 3D printed case, the mounting areas were quite fragile, so for this reason we will use an infill of 100%.
Step 6: Code
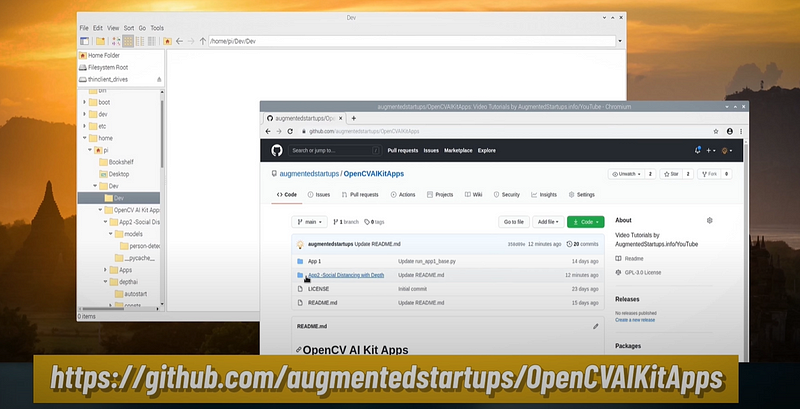
First up head over to this GitHub repo:
Git clone it to a folder with:
git clone https://github.com/augmentedstartups/OpenCVAIKitApps
Now It is important to note that you have to first complete this tutorial for this to work, if you haven’t already watched the video, you will find the light right up here In this repo you will be able to clone the necessary files that we will use in this tutorial series.
There will be 2 files, social_distance_base.py and social_distance_final.py. If you want to skip the coding part then you can also skip to the Implementation and Testing chapter in this video using the final.py file.
Otherwise run:
python3 install requirements.txt
python3 -m pip install imutils==0.5.3
python3 -m pip install concurrent-log-handler==0.9.16
python3 main.py
Step 7: Summary
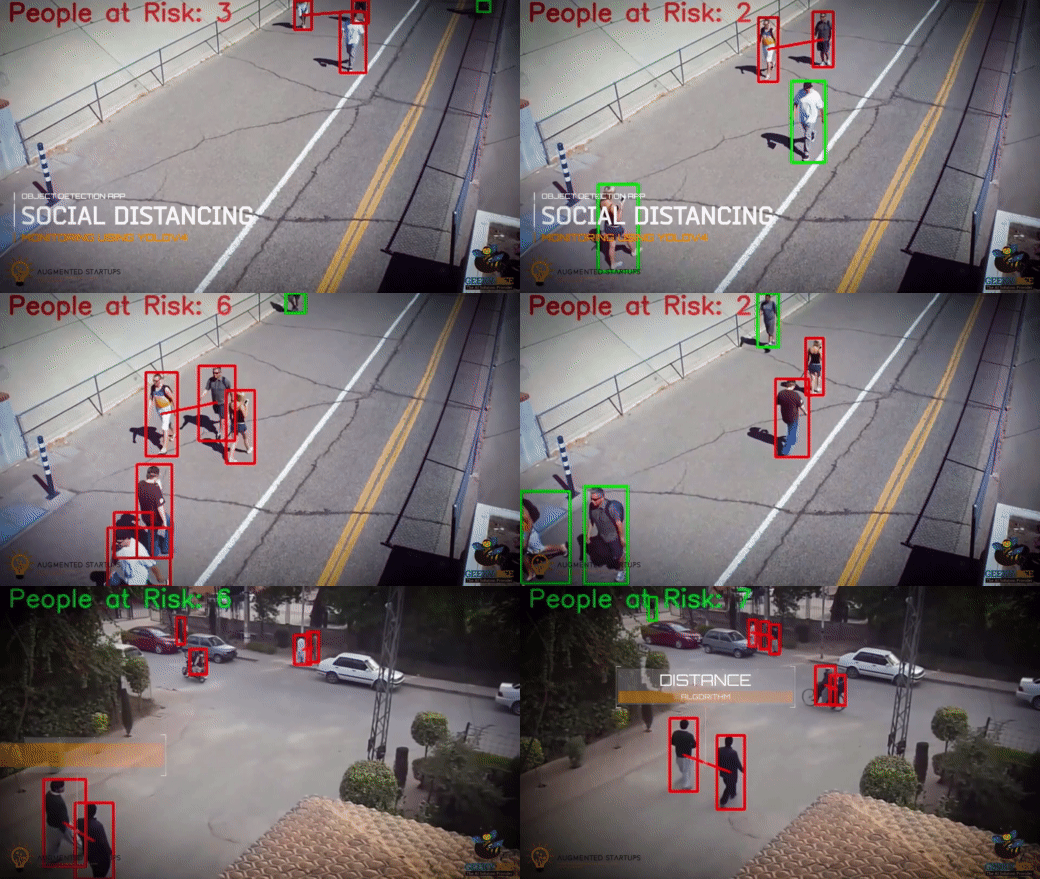
We just run the app, and we can test our code with two people.
As one person approaches the other, The people are detected and if they cross the preset threshold, the alert will sound and politely advice people to maintain their social distance.
Stay connected with news and updates!
Join our newsletter to receive the latest news and updates from our team.
Don't worry, your information will not be shared.
We hate SPAM. We will never sell your information, for any reason.


![AI In Agriculture [NEW]](https://kajabi-storefronts-production.kajabi-cdn.com/kajabi-storefronts-production/file-uploads/themes/2153492442/settings_images/f3fdf8-e3fc-6bce-d26-2adc20ba5c0a_1e6bab8-d7b-d76c-e28c-fa6d513e45d_7138c16-f641-8fdf-e206-2bcac503bc5_AI_AGRI.webp)


